Wednesday, 28 January 2009

What If Wednesday - melting moments

Wow, Wednesday came around again so quickly!

I thought I'd stay with things that melt and show what happens when you iron cellophane paper.
This is the heavy type of cellophane used by florists to wrap flowers.
Place between two sheets of baking paper and iron, experiment with heat settings and length of time (usually only a matter of seconds)
Although it doesn't give off the fumes like tyvek I'd still advise a well ventilated room.
After the bubbles have formed on the paper you can brush over a metallic paint.
Whilst you get a similar appearance to tyvek, these papers are not as hard wearing but can be easily stitched to fabric by hand or machine.
Don't overdo the machine stitching as it could cause the paper to rip away easily.


The reverse side with the bubbles down also has a nice texture when brushed with a little paint.


The next piece was silver cellophane ironed then free machined onto a piece of tulle, the tulle was cut away in sections leaving open lacework of machined stitching.


Next was a cellophane Doritos packet, ironed, stitched and painted.


Finally,
not paper but tin, this was a piece of heavy aluminium foil, flattened and hammered to create texture. We held it over a flame which was supposed to give the metal an anodised look but mine just went black. Machine stitched to fabric. Probably not a good way to treat your sewing machine as it was very heavy going, if you try this, keep your blunt machine needles just for doing this.....if they weren't blunt before, they will be after!

Wednesday, 21 January 2009

The Whatiffers Movement

There seems to be a growing movement of "WhatIffers" amongst my textile contacts.
Sara Lechner has started a new blog called Whatiffing Around and a Flickr group of the same name.

I was first introduced to the "what happens if" by Carol Wilkes, an Australian textile artist, can't remember how many years ago now, but it was at the now defunct "Camp Creative" which was a full week of playing at Katoomba, they had workshops in everything from textiles, drumming, art, blacksmithing, sculpture. Friends and I would rent a cottage in the main street and have the most amazing week.

A couple of years ago I started putting my "whats" experiments in a little notebook, (if you don't write it down, it is too easy to forget the secret ingredient), so I thought I might show it here.

It's a bit of a mixed bag but mostly textile related.
I'll start today with tyvek:

There are lots of web sites around with information on tyvek, enter the phrase "using tyvek for art" into google and you'll find loads of information so I won't repeat all of it here, but will say do it in a well ventilated space, there WILL be fumes, and when you paint it before melting you can add paint fumes as well - not a healthy mix.

There are also different weights and grades of tyvek, what you get depends whether you shop with an art supplier, hardware store or post office.
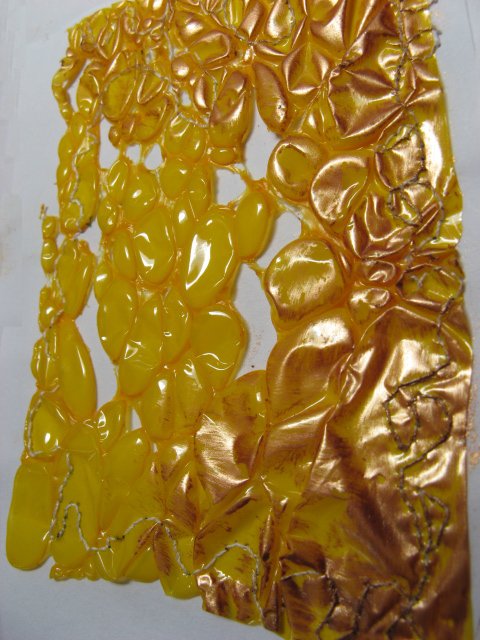
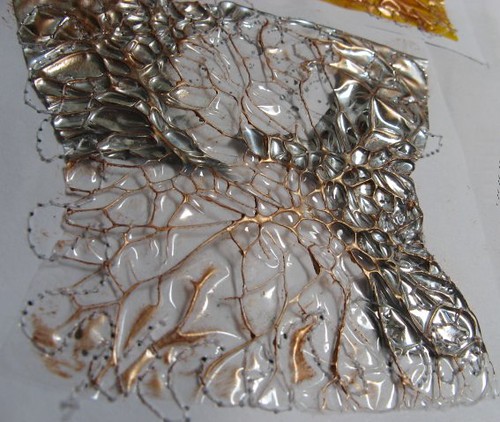
The first two pictures are the thin sheets bought from an art supply:

tyvek
painted and stitched before applying heat with an iron (put it between two sheets of baking paper before ironing)
tyvek
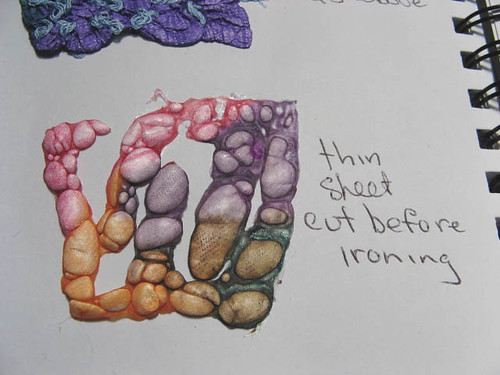
this was a thin sheet painted then cut before ironing

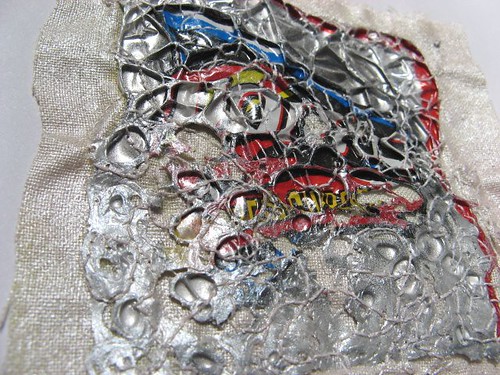
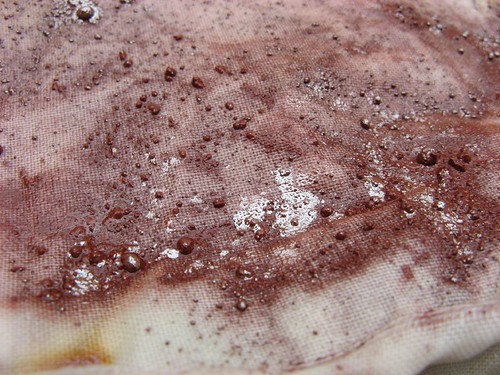
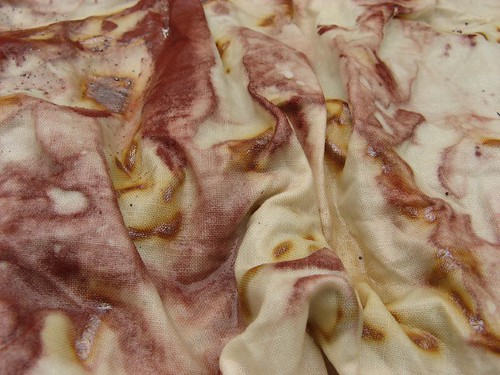
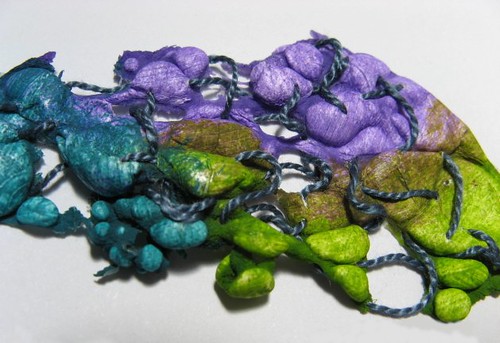
The next is a piece of tyvek from a pair of painters disposable overalls bought in a hardware store - much softer and pliable fabric but didn't appear to melt as much.
tyvek

Next is a FedEx bag received in the mail from the US - I haven't checked the Australian Post Office but I'm pretty sure we don't have tyvek bags here.
tyvek

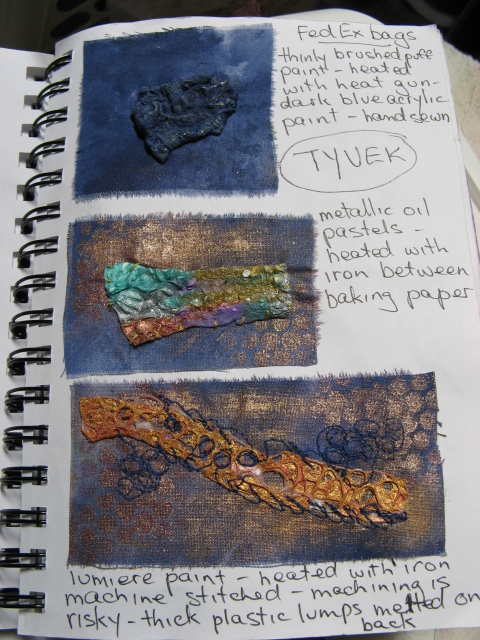
The first piece at the top of this next page was brushed with puff paint, which puffs up on heating - don't ask where to get it! I've had a bottle for about 15 years! (Part of my "Use It and Don't Buy Anything New" programme for this year)
Heated with a heat gun.
tyvek
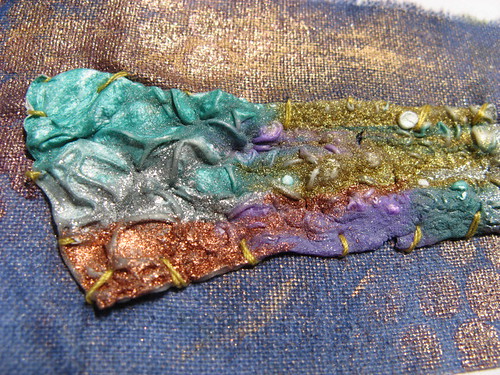
the piece in the centre of page was coloured with metallic oil pastels and ironed.

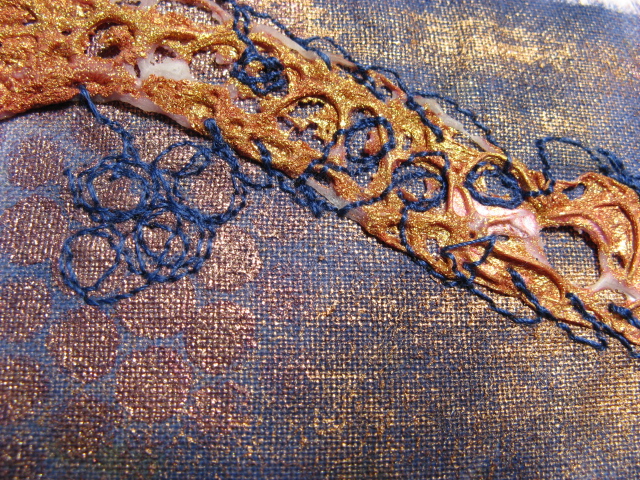
next was painted with Lumiere paint, then melted and sewn in place with free machining - be very careful doing this - you can see the little opaque white bits, they have turned into pure plastic blobs and will break needles. Of all the different grades I tried, the FedEx bag seemed to have the hardest surface when melted.


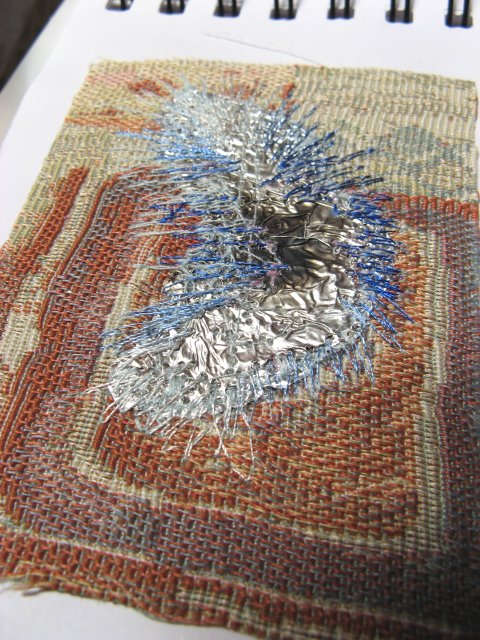
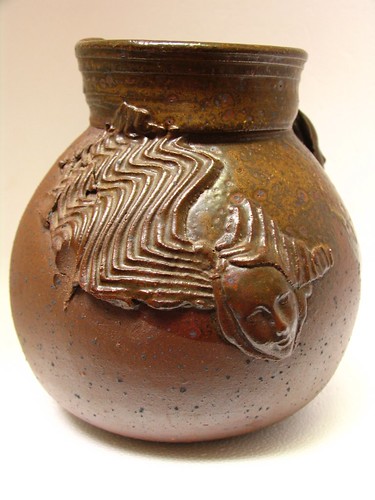
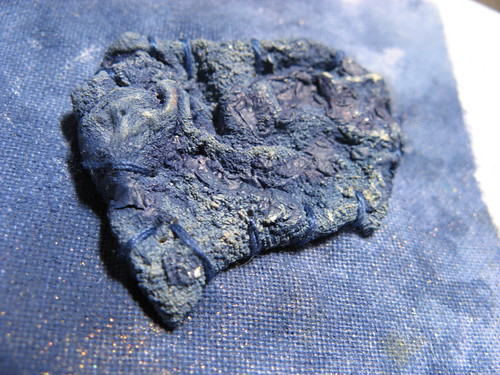
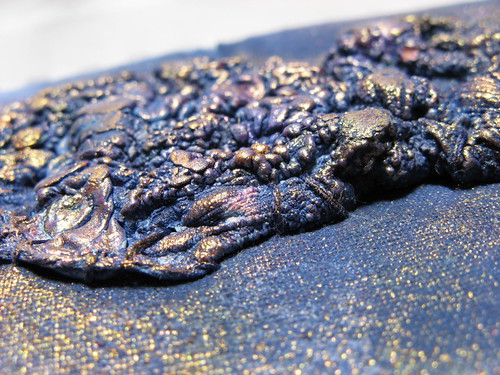
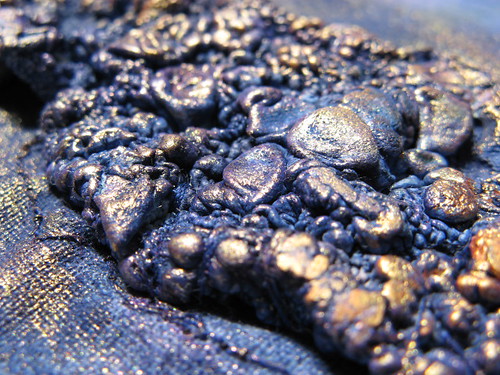
Next is I think my all time favourite piece of tyvek - without any help it seemed to form a goddess shape:

tyvek goddess

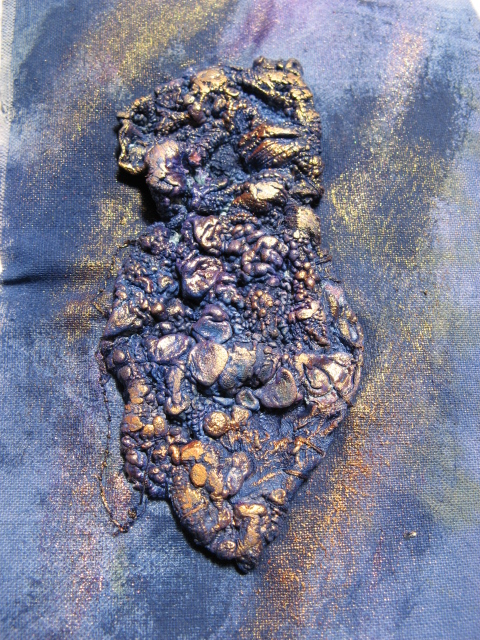
It is thick puff paint on a piece of Fed Ex bag, heated with a heat gun, then dark blue acrylic paint with highlights of gold Lumiere paint, hand sewn after I broke a machine needle on it. Isn't it yummy!

tyvek
tyvek
tyvek

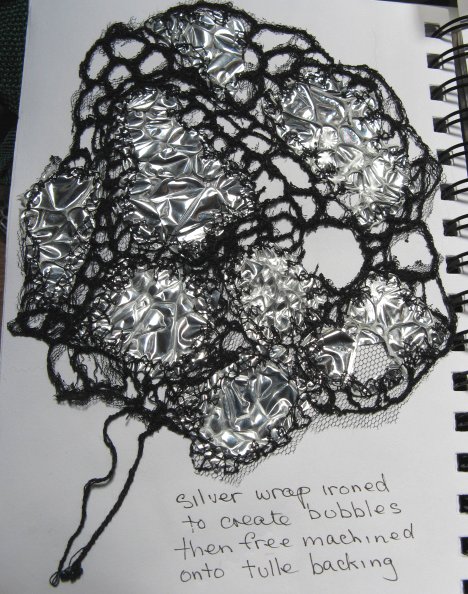
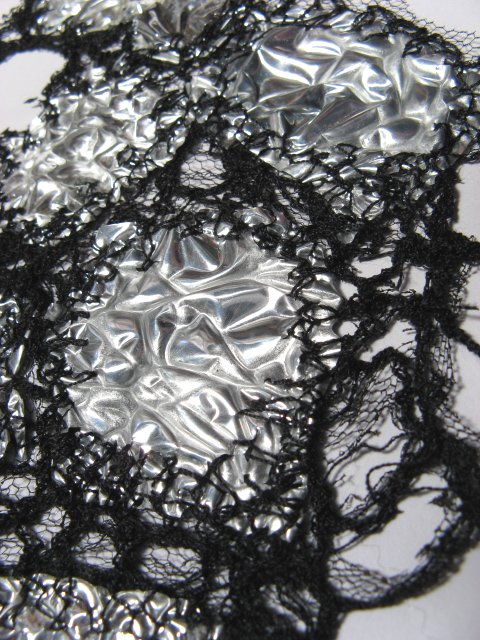
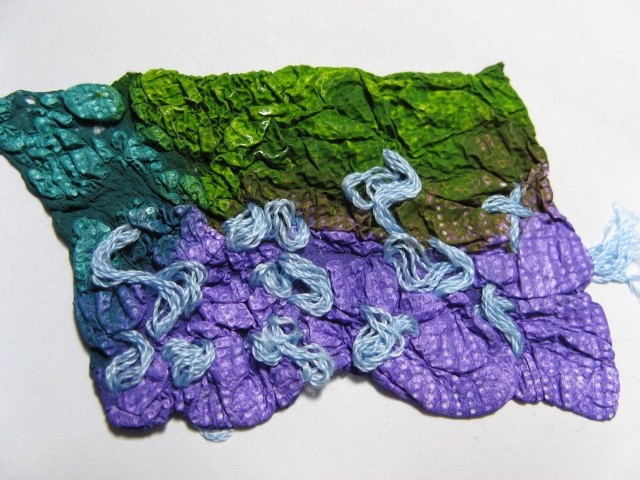
And here's a few more:
#122/366 tyvek experiments

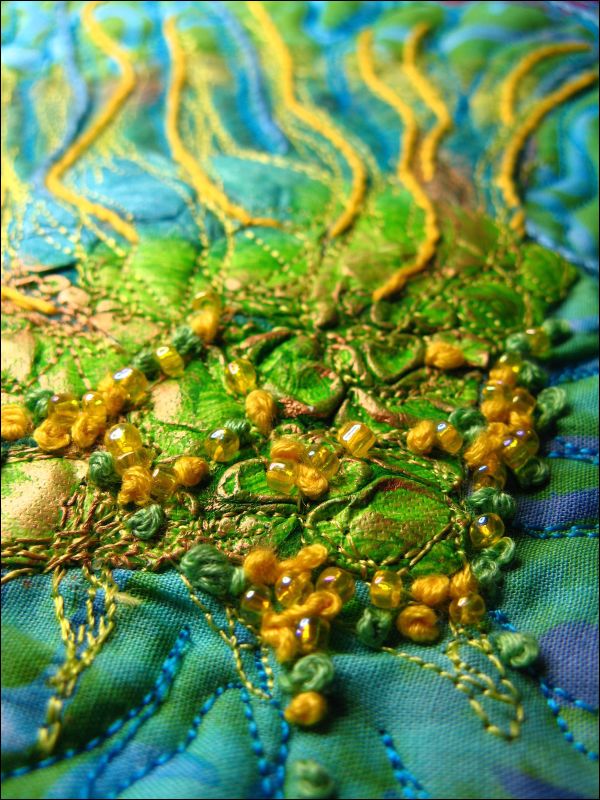
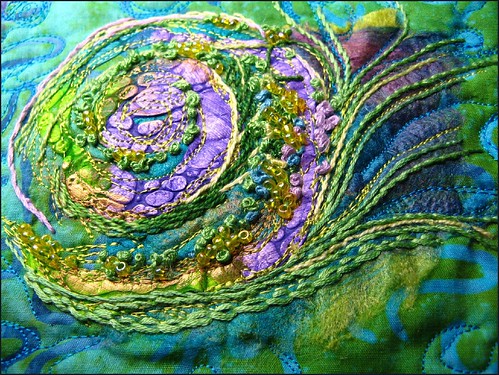
then if you are wondering what to do with all these little pieces, you could work it into your embroidery:
new growth
galaxy

phew!
If you want to see any of these larger, click to go to Flickr, I've made them all small to fit in my new 3 columns template.

I have lots more What Ifs but I think this was the biggest - I might make it a regular What If Wednesday, which should get me working!

Monday, 19 January 2009

Lilly Pilly with needlefelt

Lilly Pilly flowers

I've been playing with my needlefelt machine, took a break in the garden and found my Lilly Pilly is flowering, they are similar to a gum nut flower but much smaller and delicate


Lilly Pilly flowers

Monday, 5 January 2009

Summertime!!

MSH - Some like it hot

I've swapped a husband for a grandchild for two days - they are doing father/son bonding/fishing - we are swimming (well one of us is!)

Saturday, 3 January 2009

Slow Cloth and Practical Pottery

low fired stitchery

The problem is going to be narrowing a very wide field - I've found enough ideas to make this a lifetime work.

Also have a title - how is this LOL:

"The Handbuilders Approach to Soft Pottery and Slow Cloth: including Kiln Building and Low-fired Stitchery"

I tried some fabric dyeing with iron oxide yesterday, but the results were disappointing, the very vivid looking red on the wet fabric washed out to a pale pink.
I'll do some more and try setting it in the micro-wave before washing.

The iron oxide seemed to have a reaction to the vinegar I had soaked the cloth with, and gave off an irridescent sheen which looked really good while it was still wet.

dyeing fabric with iron oxide

dyeing fabric with iron oxide

dyeing fabric with iron oxide

Thursday, 1 January 2009

Embroidered pottery

I need a project for 2009 – slow cloth – something to pick up and put down with no pressure and no deadline.

This week I sorted through my old TAFE college notes from the ceramic certificate I completed in...1980 something...

stoneware vase

I knew even as I dumped notes in the recycle bin that I would find a need for molecular formula (I can’t even believe I once knew how to do it!)
One of my potter friends keeps her notes just to prove to herself that she once had a brain.

Threads started running around my head..

Memories – digging pits for blackfiring – pulling glowing red hot pots from raku –

...building a bourry box kiln in the grounds of the college and sharing salt firings with the class mates who became my friends for the next 30 years (plates of food and a flagon or two set the tone for firings to come)

...staying up til 3am cursing the cone that took forever to bend.

...the excitement of cracking the door of a still hot kiln because I just couldn’t wait any longer for it to cool

...the oohs of a good firing and the aargh of a bad pot (always the one pot already spoken for)

my pottery

...and I recalled saying as I stacked yet another kiln –
“If this was sewn it would be finished now, I don’t have to fire fabric!!”

and that is when IT came to me – I could embroider my pottery – well, not the *actual* pottery, images of it, not sure how but ideas are flowing and it WILL come together - (and who is to say NOT the *actual* pottery, who knows yet)

I’m going through my ceramic textbooks and sketching and photographing, and wondering about staining cloth with oxides (thought of this when I was rust dyeing but didn’t get around to testing it)

I think this will be a good year.
Related Posts with Thumbnails