
So... friend was travelling and stayed with another dollmaker who showed her a clever way to make a dragon. As soon as she arrived home we had a TT dragon day.
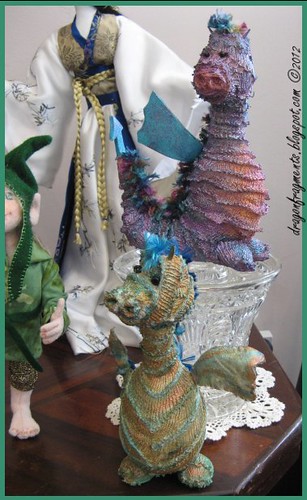
These are the dragons they made and brought along for our model:


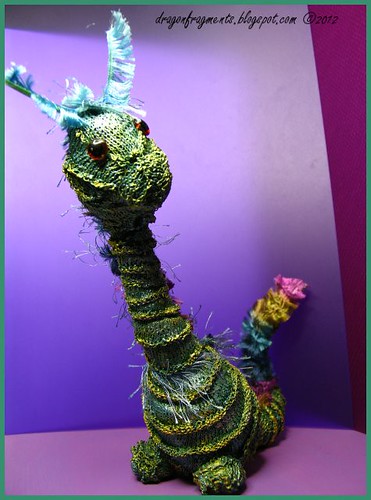
He has egg-shaped styrofoam balls for his body and head, with smaller round styrofoam balls cut in half and added to the top of his head and nose area for shaping, and two halves for his feet.
We inserted pliable aluminium sculpting wire for tail and neck.
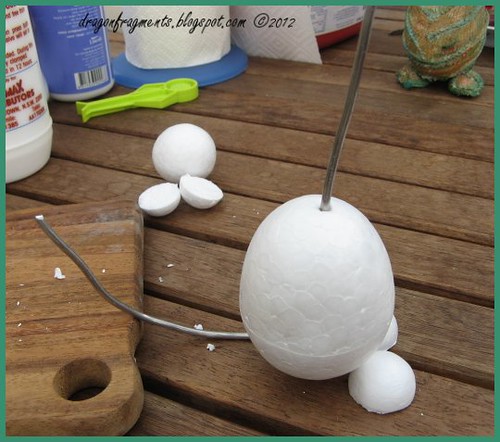
Before attaching the small half ball to the top of his head, we inserted nails to protrude as horns, you can see this clearer in the small finished photos above.
Then wrapped wadding to pad the body and neck.

Then we wrapped the whole dragon in strips of T-shirt fabric. This wasn't easy, the fabric I used was too thick and hard to drape. It needs some experimenting. I finished by unwrapping him when I got home and doing it all again.
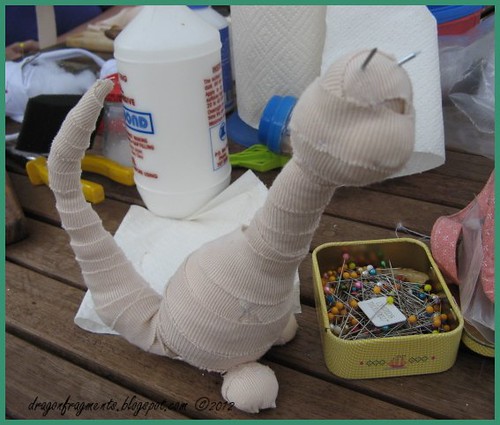

We were then supposed to paint the whole body with a watered solution of PVA glue to stiffen this layer. Not many of us got to this stage, and those who did found their dragon was taking too long to dry so couldn't go any further that day.

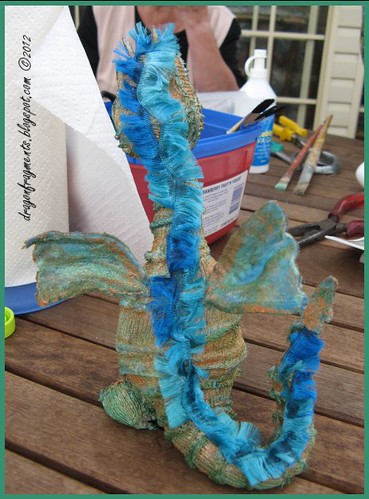
When our dragons were dried and hardened, we wrapped them again in a very stretchy open fabric which was bought from the car supplies shop, it's sold as hand wipes. The nice thing about this fabric is when it is cut into strips for wrapping, each side of the strip curls over and forms a ridge.
Once again it wasn't easy to wrap, when finished it was also painted with the fabric stiffener solution.
I wasn't happy with the nail horns which by now had been lost amongst the wrapping, so I stuck a thin straw onto each nail to lengthen it.
..and realised that once again I'd forgotten the wings! maybe I'll add them later, maybe not.


1 comment:
Brilliant idea. He/she turned out very cute:)
Post a Comment